As energy efficiency and occupant comfort become central priorities in modern building design, radiant in-floor heating systems have gained substantial popularity in both residential and commercial applications. These systems offer an energy-efficient and uniform method of indoor heating by circulating warm water or electric heating elements beneath the floor surface. Their ability to deliver consistent warmth directly to the occupied zone, coupled with operational efficiency and aesthetic flexibility, makes them an attractive alternative to conventional heating systems.
Nonetheless, the efficacy of these systems is significantly influenced by their thermal response and performance attributes. This article explores the science behind the thermal behavior of radiant in-floor heating systems, factors influencing their performance, and how to optimize their design and operation for maximum efficiency and comfort.
What is Radiant In-Floor Heating?
Radiant in-floor heating systems work by radiating heat upward from the floor surface into the living space. There are two primary types:
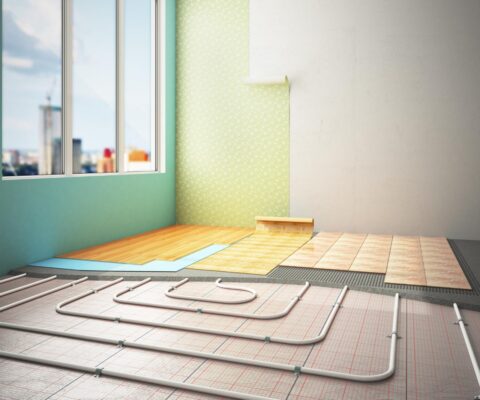
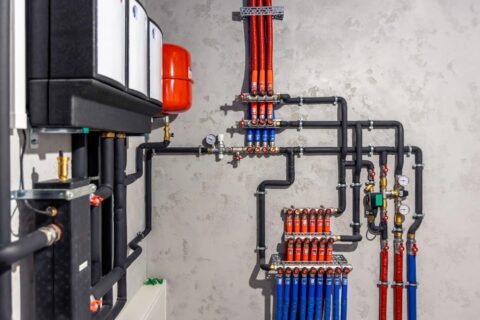
- Hydronic Systems: Utilize a network of water-filled tubes embedded in the floor, heated by a boiler, heat pump, or water heater.
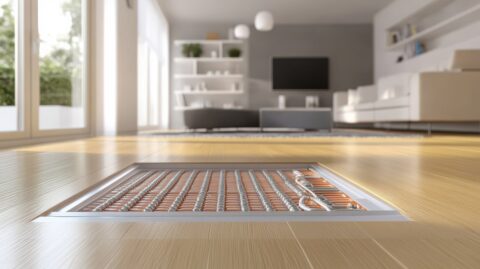
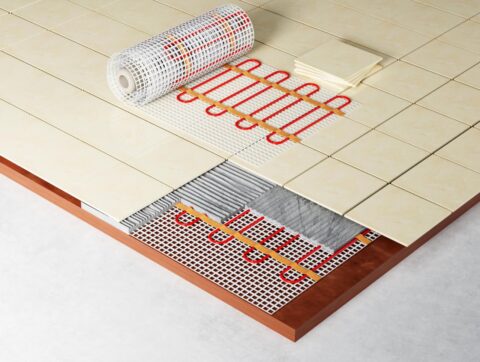
- Electric Systems: Consist of electrically heated cables or mats installed under the flooring.
Regardless of the system type, radiant floor heating provides heat transfer predominantly through radiation (direct heat waves) and secondarily through convection (natural air movement due to temperature gradients).
Understanding Thermal Response in Radiant Floor Heating
Definition of Thermal Response
Thermal response refers to how quickly and effectively a radiant floor heating system can adjust the temperature of the heated space to meet a set point or respond to changes in heating demand. This involves:
- Heat-up Time: The time it takes for the floor to reach operational temperature from a cold start.
- Thermal Lag: The delay between system activation and noticeable temperature rise in the room.
- Cooling Time: The time required for the floor and room to cool down after the system is turned off.
An understanding of these dynamics is essential for system design, control strategies, and occupant comfort.
Factors Influencing Thermal Response
Several factors affect the thermal response of radiant floor systems:
- Floor Construction and Material
- Thermal Mass: Floors with high thermal mass (e.g., concrete, stone) store heat longer but have slower response times.
- Floor Covering: Materials like tile and stone conduct heat well, while carpet and wood act as insulators, reducing response speed and overall efficiency.
- Thermal Mass: Floors with high thermal mass (e.g., concrete, stone) store heat longer but have slower response times.
- Heating Medium
- Hydronic Systems: Typically have slower response times due to the mass of water and the structure it must heat.
- Electric Systems: Offer faster heat-up and cool-down times as electrical elements can be directly embedded beneath the surface with minimal thermal mass.
- Hydronic Systems: Typically have slower response times due to the mass of water and the structure it must heat.
- Insulation
- Adequate subfloor insulation minimizes downward heat loss and enhances upward heat transfer, improving system response and efficiency.
- Adequate subfloor insulation minimizes downward heat loss and enhances upward heat transfer, improving system response and efficiency.
- Control Systems
- Advanced thermostats and zoning systems allow for better temperature regulation and faster response times through predictive and adaptive control algorithms.
- Advanced thermostats and zoning systems allow for better temperature regulation and faster response times through predictive and adaptive control algorithms.
- Environmental Conditions
- External temperature, humidity, and internal heat gains from appliances, lighting, and occupants can influence how quickly a room reaches or deviates from the desired temperature.
- External temperature, humidity, and internal heat gains from appliances, lighting, and occupants can influence how quickly a room reaches or deviates from the desired temperature.
Thermal Performance of Radiant In-Floor Heating Systems
Defining Thermal Performance
Thermal performance describes the system’s ability to efficiently maintain desired indoor temperatures while minimizing energy consumption and thermal stratification. Key performance metrics include:
- Uniformity of Floor Surface Temperature
- Energy Consumption per Unit Area
- Heat Distribution within the Occupied Zone
- Time to Reach Setpoint Temperatures
- System Efficiency (Coefficient of Performance – COP for hydronic systems)
Heat Transfer Mechanisms
Radiant in-floor heating depends on three methods of heat transfer:
- Conduction: Heat moves from the heating element to the floor surface.
- Radiation: Heat is emitted from the warm floor surface to the surrounding space and occupants.
- Convection: Secondary, as heated air rises naturally from the warm floor.
The system’s effectiveness depends on optimizing these mechanisms through material selection, system layout, and operational control.
Advantages in Thermal Performance
- Even Heat Distribution
- Eliminates cold spots and drafts common in forced-air systems.
- Maintains a temperature gradient where the floor is warm, and the head zone is slightly cooler, which is ideal for comfort.
- Eliminates cold spots and drafts common in forced-air systems.
- Lower Operating Temperatures
- Radiant floor systems can operate effectively at lower fluid or element temperatures (29–35°C for residential use), reducing energy use.
- Radiant floor systems can operate effectively at lower fluid or element temperatures (29–35°C for residential use), reducing energy use.
- Reduced Heat Loss
- Radiant systems limit duct losses, infiltration, and thermal bridging.
- Radiant systems limit duct losses, infiltration, and thermal bridging.
- Energy Efficiency
- Studies indicate energy savings of 10–30% compared to conventional systems, particularly when combined with smart controls and zoning.
- Studies indicate energy savings of 10–30% compared to conventional systems, particularly when combined with smart controls and zoning.
Thermal Response and Performance Analysis: Hydronic vs. Electric Systems
Hydronic Radiant Floor Heating
Thermal Response Characteristics:
- Slower Heat-Up Time: Due to water volume and thermal mass.
- Longer Heat Retention: Beneficial for steady-state heating in colder climates or continuous-use spaces.
- Thermal Inertia: High; difficult to rapidly adjust temperatures.
Performance Factors:
- Efficiency improves with condensing boilers or heat pumps.
- Requires careful control to avoid overheating due to slow response.
Ideal Applications:
- Large areas, continuous occupancy buildings, new constructions with concrete slabs.
Electric Radiant Floor Heating
Thermal Response Characteristics:
- Rapid Heat-Up and Cool-Down: Suitable for intermittent use.
- Low Thermal Inertia: Allows precise temperature control.
Performance Factors:
- Higher operating costs per kWh in regions with expensive electricity.
- Easier installation in retrofits and small areas like bathrooms.
Ideal Applications:
- Renovations, supplemental heating, localized comfort areas.
Enhancing Thermal Response and Performance
Design Considerations
- Floor Assembly Optimization
- Use high-conductivity floor finishes (tile, stone).
- Incorporate high-performance insulation beneath heating elements.
- Use high-conductivity floor finishes (tile, stone).
- Zoning and Control Systems
- Divide spaces into multiple heating zones with independent controls.
- Integrate smart thermostats with adaptive learning capabilities.
- Divide spaces into multiple heating zones with independent controls.
- System Sizing and Layout
- Properly size systems based on heat loss calculations.
- Optimize pipe or cable spacing for uniform heat distribution.
- Properly size systems based on heat loss calculations.
- Integration with Renewable Energy
- Hydronic systems can be coupled with solar thermal collectors or geothermal heat pumps for enhanced sustainability.
- Hydronic systems can be coupled with solar thermal collectors or geothermal heat pumps for enhanced sustainability.
Challenges in Thermal Response and Performance
- Delayed Response in High Thermal Mass Systems
- Mitigated with predictive control strategies and continuous low-level heating.
- Mitigated with predictive control strategies and continuous low-level heating.
- Installation Costs
- Higher initial costs compared to conventional systems, especially for hydronic systems in retrofits.
- Higher initial costs compared to conventional systems, especially for hydronic systems in retrofits.
- Compatibility with Flooring Materials
- Some floor coverings can significantly reduce system responsiveness and efficiency.
- Some floor coverings can significantly reduce system responsiveness and efficiency.
- Thermal Comfort Perception
- Subjective factors like foot contact temperature and ambient air temperature must be balanced.
- Subjective factors like foot contact temperature and ambient air temperature must be balanced.
Case Studies and Performance Data
A study conducted by the American Society of Heating, Refrigerating and Air-Conditioning Engineers (ASHRAE) revealed the following:
- Hydronic systems embedded in concrete slabs demonstrated a heat-up time of 2–4 hours depending on insulation levels and slab thickness.
- Electric systems with low thermal mass floors (wood, tile) achieved operational temperatures within 20–40 minutes.
- Energy savings for radiant systems ranged between 15–35% compared to forced-air systems in well-insulated buildings.
Conclusion
Radiant in-floor heating systems offer a compelling combination of energy efficiency, thermal comfort, and design flexibility. Their thermal response and performance characteristics are largely determined by floor construction, system type, insulation, and control strategy.
While hydronic systems are suited for steady, continuous heating in large or new buildings, electric systems offer flexibility and rapid response for smaller, intermittent-use areas. Advances in smart controls, zoning, and integration with renewable energy sources continue to improve the performance and viability of these systems.
By understanding and optimizing the thermal response and performance parameters, building professionals can deliver highly efficient, comfortable, and sustainable heating solutions tailored to modern needs.