Overhaul in Commercial Plumbing: Enhancing Efficiency and Reliability

Overhaul in Commercial Plumbing

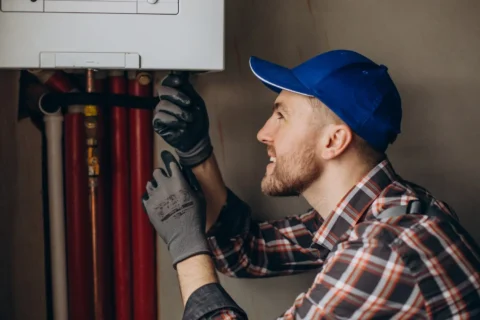
Commercial plumbing systems are the backbone of many business operations, providing essential water supply and drainage services. These systems differ significantly from residential ones due to their complexity, size, and the demands they face. Over time, even the most well-designed plumbing systems succumb to wear and tear, corrosion, or inefficiencies caused by outdated technologies. This is where an overhaul becomes necessary.

A commercial plumbing overhaul involves a comprehensive upgrade or replacement of the system to meet modern standards, improve efficiency, and ensure the system’s reliability. This process is not only a means to fix recurring issues but also an opportunity to modernize the infrastructure, reduce operating costs, and improve sustainability. In this expanded article, we will delve deeper into the need for overhauls, their benefits, key signs indicating an upgrade is required, detailed steps, challenges, and emerging trends that are shaping the future of commercial plumbing.

What Is an Overhaul in Commercial Plumbing?

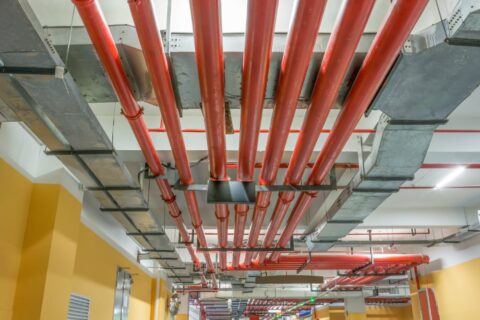
A plumbing overhaul is more than just a repair or replacement of damaged components; it’s a strategic rethinking and reconfiguration of the entire plumbing system. It encompasses the replacement of old pipelines, fixtures, and water heating systems with advanced, efficient, and durable alternatives. This upgrade often includes:

  • Replacing outdated pipes that are prone to leaks or corrosion.
  • Upgrading fixtures and appliances to water- and energy-efficient models.
  • Redesigning layouts to improve water flow and system functionality.
  • Implementing smart plumbing technologies like automated leak detection systems and water usage monitors.

Such an overhaul not only resolves existing issues but also positions the building for future demands and regulatory compliance, making it a critical investment for commercial property owners.

Why Are Overhauls Necessary in Commercial Plumbing?

Overhauls are essential for addressing systemic inefficiencies that can result in increased operational costs, potential health risks, and disruptions to business operations. Here are some key reasons why they are necessary:

1. Aging Infrastructure

The majority of commercial plumbing systems have a 40–60 year lifespan. After this, materials like cast iron or galvanized steel start to corrode, which can result in clogs, leaks, and problems with the quality of the water.

2. Increased Demand

As businesses grow or buildings are repurposed, existing plumbing systems may struggle to meet higher usage demands. For example, converting an office building into a restaurant requires significant plumbing upgrades.

3. Regulatory Compliance

Building codes and environmental regulations evolve, and outdated systems may fail to meet current standards. Overhauls ensure compliance and avoid penalties.

4. Environmental Considerations

Sustainability is a growing concern for businesses. Overhauling plumbing systems to incorporate water-saving fixtures, greywater recycling, and other green technologies helps reduce environmental impact and operational costs.

5. Health and Safety

Old plumbing systems may harbor harmful materials like lead or promote mold growth due to leaks. An overhaul eliminates these risks, ensuring a safer environment for employees, customers, and tenants.

Benefits of a Commercial Plumbing Overhaul

1. Cost Savings

While the upfront investment in an overhaul can be significant, the long-term savings in water and energy bills are substantial. Modern systems use resources more efficiently, reducing operating expenses.

2. Enhanced Performance

Outdated systems often suffer from low water pressure, frequent blockages, and slow drainage. Overhauling the system improves performance, ensuring smooth operations in high-demand environments like restaurants, hotels, and clinics.

3. Extended System Lifespan

By replacing old components with durable and modern materials, a plumbing overhaul significantly extends the lifespan of the system, reducing the need for frequent repairs.

4. Improved Water Quality

Replacing corroded pipes and integrating advanced filtration systems ensures better water quality, which is crucial for industries like healthcare and food services.

5. Competitive Edge

For businesses in competitive markets, a plumbing overhaul can serve as a unique selling point, showcasing a commitment to sustainability, efficiency, and customer satisfaction.

Signs Your Commercial Plumbing System Needs an Overhaul

  1. Recurring Issues: Frequent clogs, leaks, or water heater problems signal deeper issues that simple repairs cannot fix.
  2. Outdated Materials: Systems using materials like lead or galvanized steel need immediate attention due to health and durability concerns.
  3. Water Discoloration: Rusty or murky water is often a sign of corroded pipes.
  4. Unusual Noises: Banging or gurgling sounds in the plumbing system may indicate blockages or high water pressure.
  5. High Maintenance Costs: Rising expenses for frequent repairs and high water bills indicate inefficiencies that warrant a full overhaul.
  6. Lack of Capacity: A system unable to meet current or projected demands needs reconfiguration or expansion.

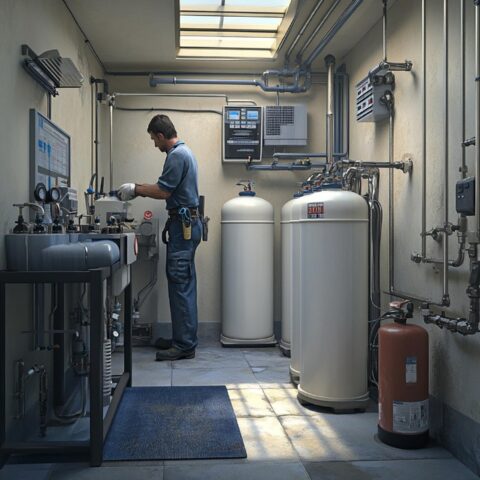
The Plumbing Overhaul Process: A Detailed Breakdown

1. System Evaluation

A professional plumber conducts a thorough inspection using advanced diagnostic tools such as:

  • Camera Inspections to detect internal pipe damage or blockages.
  • Water Pressure Tests to identify inefficiencies.
  • Thermal Imaging to locate hidden leaks.

2. Strategic Planning

The results are utilized to create a personalized strategy. This includes:

  • This entails choosing materials that are appropriate for the purposes of the construction.
  • Designing layouts that optimize flow and minimize waste.
  • Coordinating with other contractors, such as HVAC or electrical teams, for seamless integration.

3. Permits and Approvals

Local regulations require permits for major plumbing work. The plumbing contractor will manage this process to ensure compliance.
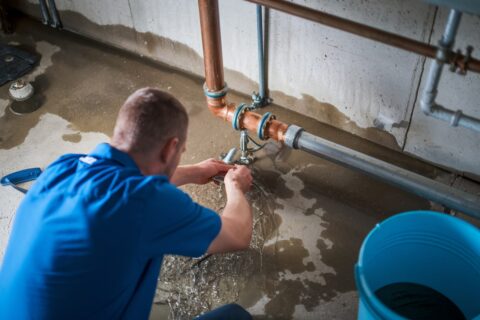
4. Implementation

The old system is dismantled, and new components are installed. This phase may include:

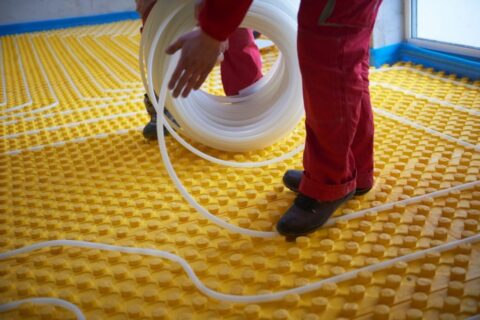
  • Replacing pipes with modern materials like PEX or copper.
  • Installing energy-efficient water heaters and low-flow fixtures.
  • Upgrading drainage systems to prevent backups.
  • Adding water filtration or recycling systems for sustainability.

5. Testing and Finalization

The new system is rigorously tested for leaks, pressure stability, and functionality. Any adjustments are made before obtaining final approvals from local authorities.

Challenges in Overhauling Commercial Plumbing Systems

  1. Downtime: Businesses may face temporary disruptions during the overhaul process. Planning work during off-hours or weekends can mitigate this.
  2. Cost Management: Overhauls can be expensive, especially in large facilities. Proper budgeting and phased implementation can help manage costs.
  3. Hidden Damage: Unexpected issues, such as underground pipe collapses, may increase the scope and cost of the project.
  4. Coordination: Large-scale overhauls often require collaboration between multiple teams, necessitating careful coordination.

Emerging Trends in Commercial Plumbing

The plumbing industry is experiencing rapid technological advancements, many of which are transforming commercial plumbing systems.

1. Smart Plumbing Solutions

  • Internet of Things (IoT) devices that monitor water usage and detect leaks in real time.
  • Automated shutoff valves that prevent water damage during emergencies.

2. Sustainable Technologies

  • Greywater recycling systems that reuse wastewater for irrigation and other non-potable applications.
  • Rainwater harvesting systems to reduce dependency on municipal water supplies.

3. Advanced Pipe Materials

  • Durable materials like cross-linked polyethylene (PEX) and stainless steel, which resist corrosion and last longer.

4. Renewable Energy Integration

  • Solar water heating systems and geothermal solutions that reduce energy consumption.

5. Modular Plumbing Designs

  • Prefabricated components that reduce installation time and costs while improving system efficiency.

Conclusion

A commercial plumbing overhaul is more than just an upgrade—it’s an investment in the future of your business. By addressing inefficiencies, ensuring compliance, and adopting modern technologies, an overhaul can significantly enhance the reliability, performance, and sustainability of your plumbing system.

Whether your building is grappling with frequent plumbing failures, rising operational costs, or evolving demands, a professional plumbing overhaul is the key to staying ahead. Partnering with experienced contractors ensures the process is seamless, allowing you to focus on running your business while reaping the long-term benefits of a modernized system.

In today’s competitive landscape, businesses that prioritize infrastructure improvements are better positioned for success. A well-executed plumbing overhaul not only resolves immediate issues but also sets the stage for growth, efficiency, and environmental responsibility in the years to come.

Top Ideas for Better Performance in Residential Plumbing

Residential Plumbing

Residential plumbing systems are the backbone of any home, ensuring efficient water flow for daily activities such as cooking, cleaning, and bathing. A well-maintained plumbing system enhances a home’s functionality and minimizes long-term costs associated with repairs and water damage. Whether you’re building a new home, remodeling, or simply looking to optimize your existing system, here are some top ideas for improving residential plumbing performance.

1. Prioritize Quality Plumbing Materials

Using high-quality materials is the foundation of a reliable plumbing system. Opt for materials like:

PEX piping: Flexible, durable, and resistant to freezing and bursting.

Copper pipes: Known for their longevity and resistance to corrosion.

Brass fittings: Corrosion-resistant and ideal for high-pressure applications.

Investing in durable materials reduces the likelihood of leaks, blockages, and premature replacements, saving money over time.

2. Implement Water-Efficient Fixtures

Water conservation is a growing concern, and upgrading to water-efficient fixtures can significantly improve plumbing performance. Consider:

Low-flow faucets and showerheads: Reduce water consumption without compromising performance.

Dual-flush toilets: Allow users to select between low and high water usage.

Tankless water heaters: Provide hot water on demand, reducing water waste.

These fixtures not only lower water bills but also lessen the strain on the plumbing system.

3. Install a Smart Plumbing System

Smart technology has revolutionized home systems, including plumbing. Features like smart water monitors and leak detectors allow homeowners to track water usage and identify issues early. Key benefits include:

Leak detection alerts: Prevent costly water damage by addressing leaks immediately.

Remote shut-off valves: Control the water supply even when you’re away from home.

Usage tracking: Monitor water consumption patterns to identify inefficiencies.

Investing in smart plumbing devices ensures a proactive approach to system maintenance.

4. Insulate Pipes for Better Efficiency

Pipe insulation is essential for optimizing plumbing performance, especially in colder climates. Benefits include:

Preventing frozen pipes: Insulated pipes are less likely to burst in freezing temperatures.

Energy savings: Reduce heat loss in hot water pipes, lowering energy costs.

Condensation control: Minimize the risk of moisture-related damage.

Use foam pipe insulation or fiberglass wraps for best results, focusing on exposed pipes in basements, attics, and crawl spaces.

5. Optimize Water Pressure

High or low water pressure can impact the performance of your plumbing system. Regularly monitor and adjust water pressure to:

Prevent leaks and pipe damage: Excessive pressure can strain joints and fixtures.

Ensure efficient fixture performance: Low pressure can lead to inadequate flow in showers and faucets.

Install a pressure-reducing valve (PRV) to regulate water pressure effectively, keeping it within the recommended range of 40-60 psi.

6. Schedule Regular Maintenance

Preventative maintenance is crucial for long-term plumbing performance. Routine tasks include:

Flushing water heaters: Remove sediment buildup to enhance efficiency.

Cleaning aerators and showerheads: Eliminate mineral deposits that restrict water flow.

Inspecting for leaks: Check pipes, faucets, and fixtures for signs of wear or damage.

Septic tank pumping: Regularly service septic systems to prevent backups.

Hiring a licensed plumber for annual inspections ensures small issues are addressed before they escalate.

7. Upgrade to Advanced Drainage Solutions

Efficient drainage is a cornerstone of a functional plumbing system. Consider these upgrades:

Backwater valves: Prevent sewage from backing up into your home during heavy rainfall.

French drains: Redirect excess water away from your property, protecting your foundation.

Advanced clog prevention systems: Install strainers or debris traps to minimize blockages.

Proper drainage solutions ensure wastewater flows efficiently, preventing costly repairs.

8. Incorporate Greywater Recycling Systems

Greywater systems recycle wastewater from sinks, showers, and washing machines for non-potable uses like irrigation. Benefits include:

Water conservation: Reduce reliance on freshwater sources.

Cost savings: Lower water bills by repurposing wastewater.

Eco-friendly practices: Support sustainable living by minimizing water waste.

Integrating greywater systems requires professional installation and adherence to local building codes.

9. Use Air Admittance Valves (AAVs)

Air admittance valves provide an alternative to traditional vent pipes, improving ventilation in plumbing systems. Advantages include:

Space-saving design: Ideal for tight spaces or remodels.

Cost-effective installation: Reduce the need for extensive pipework.

Improved drainage performance: Allow air to enter the system, preventing siphoning.

AAVs enhance plumbing efficiency without compromising functionality.

10. Install a Whole-House Water Filtration System

Hard water and contaminants can impact plumbing performance and water quality. A whole-house filtration system offers:

Protection for appliances and pipes: Prevent mineral buildup and corrosion.

Improved water quality: Remove chlorine, sediment, and other impurities.

Health benefits: Ensure clean, safe water for drinking and bathing.

Choose a system based on your home’s water source and specific filtration needs.

11. Upgrade Old Fixtures and Pipes

Aging plumbing components can hinder performance and increase repair costs. Signs it’s time for an upgrade include:

Discolored water: Indicates rust or corrosion in pipes.

Frequent leaks: Suggests deteriorating materials.

Low water pressure: May result from clogged or outdated fixtures.

Replace outdated components with modern, efficient alternatives to boost system reliability.

12. Embrace Sustainable Plumbing Practices

Sustainability is becoming a key focus in residential plumbing. Some ideas include:

Rainwater harvesting: Collect rainwater for irrigation or non-potable uses.

Composting toilets: Reduce water usage in areas with limited resources.

Permeable pavement systems: Manage stormwater runoff effectively.

These practices reduce environmental impact while improving overall plumbing efficiency.

13. Install an Expansion Tank

Expansion tanks are essential for homes with closed-loop water heating systems. They absorb excess pressure caused by water expansion during heating, protecting:

Pipes and fittings: Preventing strain and potential leaks.

Water heaters: Extending the lifespan of the unit.

This simple addition can save homeowners from costly repairs down the line.

14. Choose Professional Installation and Repairs

DIY plumbing might seem cost-effective, but improper installation or repairs can lead to long-term issues. Always hire licensed plumbers for:

Major installations: Water heaters, septic systems, or mainline replacements.

Complex repairs: Burst pipes, sewer line issues, or gas line work.

System inspections: Ensure compliance with building codes and safety standards.

Professional expertise guarantees reliable and efficient plumbing performance.

15. Educate Homeowners on Plumbing Best Practices

Simple habits can go a long way in maintaining plumbing performance. Homeowners should:

Avoid flushing non-biodegradable items: Prevent toilet clogs.

Use strainers in sinks: Trap food particles and debris.

Regularly clean drains: Minimize buildup that leads to blockages.

Address small leaks promptly: Prevent water waste and structural damage.

Providing homeowners with maintenance tips ensures long-term system efficiency.

16. Install Recirculating Pumps

Recirculating pumps provide hot water instantly by keeping it circulating through the pipes. Benefits include:

Reduced water waste: Eliminate the need to run taps while waiting for hot water.

Convenience: Immediate access to hot water at any fixture.

Energy efficiency: Advanced models use timers to minimize energy usage.

These pumps are especially beneficial for larger homes with long pipe runs.

17. Utilize Trenchless Pipe Repair Techniques

Traditional pipe repair methods can be invasive and costly. Trenchless techniques offer a modern alternative by:

Minimizing property disruption: Avoid digging up yards or driveways.

Reducing repair time: Complete projects faster with minimal labor.

Extending pipe lifespan: Use durable materials like epoxy liners.

This innovative approach is ideal for addressing underground pipe issues efficiently.

18. Incorporate Pressure-Assisted Toilets

Pressure-assisted toilets use compressed air to enhance flushing power, providing:

Water savings: Use less water per flush compared to traditional toilets.

Improved performance: Minimize clogs and maintenance.

Eco-friendly design: Align with green building initiatives.

These toilets are an excellent choice for homes looking to balance performance with sustainability.

19. Consider Zoning in Plumbing Systems

Zoning divides the plumbing system into separate areas, each with its own shut-off valve. Advantages include:

Ease of maintenance: Isolate sections for repairs without disrupting the entire system.

Customized pressure settings: Tailor water pressure to specific areas.

Enhanced system control: Manage water distribution more effectively.

Zoning is particularly useful in multi-story homes or those with extensive plumbing networks.

20. Plan for Future Needs

A forward-thinking approach ensures your plumbing system can accommodate future changes. Consider:

Adding extra capacity: Install larger pipes to handle increased water demands.

Incorporating modern technology: Prepare for advancements like smart fixtures or water reuse systems.

Leaving room for expansion: Design systems that can easily adapt to remodels or additions.

Planning ahead reduces the need for costly retrofits and ensures long-term system performance.

Conclusion

Enhancing residential plumbing performance requires a combination of modern technology, sustainable practices, and regular maintenance. From upgrading materials and fixtures to embracing smart plumbing solutions, these ideas ensure efficient, reliable, and eco-friendly systems. By investing in high-quality components and professional expertise, homeowners can enjoy the benefits of a well-optimized plumbing system while reducing water bills, repair costs, and environmental impact.

The Importance of Service and Maintenance of Boiler Rooms During the Winter Season

Maintenance of Boiler Rooms

Winter brings freezing temperatures, snow, and icy winds, making it a challenging time for both residential and commercial properties. The heating system, particularly the boiler room, becomes the heart of every building, providing warmth and ensuring essential systems like hot water and heating remain functional. To avoid unexpected breakdowns and ensure the boiler operates at peak efficiency, regular service and maintenance during the winter season are critical.

This article delves into the importance of boiler room maintenance during winter, the risks of neglect, and best practices to keep systems running smoothly.


Understanding the Role of Boiler Rooms

A boiler room houses essential equipment for heating, hot water, and sometimes even snow-melting systems in outdoor spaces. These systems are critical for:

  • Residential Comfort: Providing consistent heating and hot water to homes.
  • Commercial Operations: Maintaining optimal working conditions in offices, warehouses, and factories.
  • Industrial Processes: Powering equipment or processes that require heat.

Given their significance, even minor inefficiencies or malfunctions can disrupt daily life and operations, leading to financial losses and safety concerns.


Why Winter Maintenance is Crucial

During winter, boilers are subjected to increased demand, often running continuously to maintain warmth in freezing conditions. The harsh weather exacerbates wear and tear on components, making routine maintenance more important than ever.

1. Preventing Unexpected Breakdowns

An unexpected boiler failure during winter can cause significant discomfort and inconvenience. It may lead to:

  • Freezing pipes, causing costly damage.
  • Reduced productivity in commercial or industrial settings.
  • Potential safety risks, such as carbon monoxide leaks.

Routine maintenance helps identify and address potential issues before they escalate into major problems.

2. Enhancing Energy Efficiency

A well-maintained boiler operates efficiently, consuming less fuel to produce the same amount of heat. Neglected boilers often suffer from:

  • Sediment buildup in the system, reducing heat exchange efficiency.
  • Leaks or faulty components that waste energy.

Regular servicing ensures the system runs optimally, reducing energy consumption and lowering utility bills.

3. Ensuring Safety

Boiler rooms house high-pressure equipment, which, if not properly maintained, can pose safety risks, including explosions, gas leaks, or fire hazards. Maintenance checks ensure:

  • Pressure relief valves and safety controls function correctly.
  • Gas connections are secure, preventing leaks.
  • Combustion is complete, minimizing the risk of harmful emissions like carbon monoxide.

4. Extending Equipment Lifespan

Like any mechanical system, boilers have a finite lifespan, but regular maintenance can significantly extend it. Replacing small, worn-out components before they fail prevents larger, more costly repairs or replacements.

5. Compliance with Regulations

Many regions require regular boiler inspections and maintenance to comply with safety standards and environmental regulations. Failure to adhere to these can result in fines or operational shutdowns.


Key Components of Boiler Maintenance

Thorough maintenance involves inspecting and servicing several critical components of the boiler system. Here are the key areas professionals focus on during winter servicing:

1. Boiler Unit

  • Burner Inspection: Ensuring the burner is clean and functioning correctly.
  • Heat Exchanger Check: Removing any sediment or scaling to maintain efficient heat transfer.
  • Pressure Levels: Verifying the boiler operates within safe pressure limits.

2. Pipes and Valves

  • Checking for leaks, corrosion, or blockages.
  • Insulating pipes to prevent freezing during extremely cold weather.

3. Control Systems

  • Inspecting thermostats and safety controls for accuracy.
  • Calibrating control systems to ensure optimal performance.

4. Ventilation and Exhaust

  • Ensuring proper ventilation to prevent overheating.
  • Checking exhaust systems for blockages to avoid carbon monoxide buildup.

5. Water Quality

  • Testing water for pH levels and hardness.
  • Treating water to prevent scaling, corrosion, or sludge buildup.

6. Pumps and Motors

  • Lubricating moving parts to reduce friction.
  • Checking for unusual noises or vibrations that may indicate mechanical issues.


Consequences of Neglecting Boiler Room Maintenance

Ignoring boiler room maintenance can lead to various problems, ranging from inefficiency to catastrophic failures.

1. High Energy Bills

Dirty or poorly maintained boilers consume more fuel to produce the same amount of heat, driving up energy costs.

2. Frequent Repairs

Minor issues left unaddressed can escalate, requiring frequent and costly repairs. For example, a small leak can damage internal components over time, leading to major failures.

3. Health and Safety Risks

A neglected boiler increases the risk of gas leaks or carbon monoxide poisoning, which can have fatal consequences if undetected. Additionally, high-pressure failures can lead to explosions.

4. System Downtime

Breakdowns during winter can leave properties without heat or hot water, disrupting lives and business operations.

5. Reduced Equipment Lifespan

Lack of maintenance accelerates wear and tear, shortening the boiler’s operational life and necessitating early replacement.


Best Practices for Winter Boiler Maintenance

To ensure optimal performance and reliability, follow these best practices:

1. Schedule Professional Inspections

Hire certified HVAC professionals to conduct detailed inspections before and during the winter season. They have the expertise to detect and resolve potential issues.

2. Regular Cleaning

Keep the boiler and surrounding area clean to prevent dust, debris, or blockages from affecting performance.

3. Monitor Boiler Performance

Keep an eye on the boiler’s performance indicators, such as pressure levels, temperature, and energy consumption. Any sudden changes may signal a problem.

4. Insulate Pipes

Protect pipes from freezing by using insulation, especially in areas exposed to extreme cold. Frozen pipes can cause significant damage and disrupt the heating system.

5. Test Safety Features

Regularly test safety controls, such as pressure relief valves and carbon monoxide detectors, to ensure they function correctly.

6. Maintain a Maintenance Log

Document all maintenance activities, repairs, and inspections. This helps track the system’s condition and plan future servicing.


The Role of Professional Service Providers

While some maintenance tasks can be performed by property owners, many require the expertise of professionals. Certified technicians can:

  • Conduct thorough inspections using advanced tools.
  • Identify hidden issues that may not be visible to the untrained eye.
  • Provide tailored solutions to improve system efficiency and longevity.


Conclusion

Boiler rooms are the unsung heroes of winter, ensuring warmth, comfort, and safety. However, they require regular care and attention to perform at their best. By prioritizing routine maintenance and addressing issues promptly, property owners can enjoy uninterrupted heating, lower energy bills, and peace of mind throughout the winter season.

Investing in professional boiler service is not just about preventing breakdowns—it’s about ensuring the long-term health of your heating system, protecting your property, and safeguarding the well-being of occupants. Don’t wait for a problem to arise; make maintenance a priority this winter.

Top Tips to Protect Your Plumbing in Winter

Plumbing

As temperatures drop and winter approaches, protecting your plumbing system becomes essential to avoid costly repairs and maintain a functional home. Harsh winter conditions can wreak havoc on pipes, leading to freezing, bursting, and leaks. However, with a few preventative measures and some simple maintenance, you can safeguard your plumbing and keep it running smoothly throughout the cold months. In this guide, we’ll explore the top tips to protect your plumbing in winter.


1. Insulate Your Pipes

One of the most effective ways to prevent frozen pipes is insulation. Pipes in unheated areas like basements, attics, crawl spaces, and garages are particularly vulnerable to freezing. Insulating these pipes can help maintain a steady temperature and protect them from the cold.

  • Use Foam Insulation Sleeves: Wrap foam pipe insulation around pipes to keep them warm. These sleeves are affordable, easy to install, and available at most hardware stores.
  • Heat Tape or Heat Cables: For extra protection, consider installing heat tape or heat cables on exposed pipes. These devices provide controlled heat to prevent freezing.
  • Seal Gaps and Cracks: Check for gaps or cracks around pipes that allow cold air to seep in. Use caulk or weatherstripping to seal these openings.


2. Keep Your Home Warm

Maintaining a consistent indoor temperature is crucial to keeping your pipes from freezing. Even if you’re away, ensure your home stays warm enough to protect the plumbing.

  • Set the Thermostat: Keep your thermostat set to at least 55°F (12°C) at all times, even when you’re not home.
  • Open Cabinet Doors: Allow warm air to circulate around pipes under sinks by opening cabinet doors in the kitchen and bathroom.
  • Close Garage Doors: If you have plumbing in the garage, keep the garage doors closed to retain heat.


3. Allow Faucets to Drip

Letting faucets drip during extremely cold weather can prevent water from freezing inside pipes. Running water is less likely to freeze, and even a small trickle can help relieve pressure in the pipes.

  • Target Vulnerable Areas: Focus on faucets connected to pipes in unheated spaces.
  • Cold and Hot Water: Turn on both the hot and cold water taps to ensure both supply lines are protected.


4. Drain Outdoor Water Systems

Outdoor plumbing systems, including hoses, faucets, and sprinkler systems, are highly susceptible to freezing. Draining and shutting them off properly can prevent damage.

  • Disconnect Garden Hoses: Remove and store garden hoses. Leaving them attached can trap water in the faucet, causing it to freeze and crack.
  • Shut Off Outdoor Faucets: Turn off the water supply to outdoor faucets and drain any remaining water by opening the tap.
  • Winterize Sprinkler Systems: Use an air compressor to blow out any remaining water in your sprinkler system.


5. Locate and Prepare Your Shut-Off Valve

Knowing the location of your main water shut-off valve is critical in case of an emergency. A burst pipe can cause extensive damage if the water isn’t turned off quickly.

  • Test the Valve: Ensure the valve is functional and not stuck. If it’s stiff, consider lubricating it to ensure easy operation.
  • Label the Valve: Clearly label the shut-off valve so everyone in your household knows where it is and how to use it.
  • Drain Your System: If you’ll be away for an extended period, consider shutting off your home’s water supply and draining the system to prevent freezing.


6. Check for Leaks and Repair Them

Small leaks can worsen in winter as water expands when it freezes. Inspect your plumbing system for any signs of leakage and repair them before temperatures drop.

  • Inspect Pipes and Faucets: Look for visible cracks, drips, or pooling water.
  • Seal Leaks: Use pipe sealant or epoxy to repair minor leaks. For major issues, call a professional plumber.
  • Monitor Water Pressure: Sudden drops in water pressure can indicate a hidden leak or a frozen pipe.


7. Install Frost-Proof Outdoor Faucets

If you frequently face freezing temperatures, consider upgrading to frost-proof outdoor faucets. These fixtures are designed to prevent water from freezing within the faucet, reducing the risk of pipe bursts.

  • Easy Installation: Replace existing faucets with frost-proof models or hire a plumber for professional installation.
  • Add Insulated Covers: Even with frost-proof faucets, use insulated covers for additional protection.


8. Keep Water Heater in Check

Your water heater works harder during winter, so ensuring it’s in good condition is vital for consistent performance.

  • Insulate the Water Heater: Wrap your water heater with an insulating blanket to reduce heat loss and improve efficiency.
  • Flush the Tank: Sediment buildup can reduce the efficiency of your water heater. Flush the tank annually to remove deposits.
  • Adjust the Temperature: Set the water heater thermostat to 120°F (49°C) for optimal performance and to avoid scalding risks.


9. Invest in Smart Technology

Modern smart home devices can help you monitor and manage your plumbing system during winter.

  • Smart Leak Detectors: Install leak detectors that alert you via your phone if they sense moisture or unusual water activity.
  • Smart Thermostats: These devices can maintain a consistent temperature and adjust settings remotely to prevent freezing.
  • Automatic Shut-Off Valves: Consider installing a system that automatically shuts off the water supply if a major leak is detected.


10. Regular Maintenance and Professional Inspections

Annual maintenance and inspections by a professional plumber can help identify potential issues before they become costly problems.

  • Inspect Hidden Areas: Plumbers can check areas like crawl spaces and inside walls that are hard to access.
  • Check for Weak Points: They can identify vulnerable pipes, leaks, and other potential trouble spots.
  • Service Heating Systems: Regular servicing ensures your heating system works efficiently, keeping your plumbing warm.


11. Protect Plumbing in Unused Spaces

If you have a vacation home or an area of your house that isn’t used regularly during winter, take additional steps to protect the plumbing.

  • Drain the System: Shut off the water supply and drain all pipes to prevent freezing.
  • Use Antifreeze: Pour non-toxic antifreeze into sinks, toilets, and drains to prevent any residual water from freezing.
  • Periodic Checks: If possible, have someone check the property periodically for any signs of damage.


12. Monitor Weather Alerts

Staying informed about upcoming cold snaps can help you take timely precautions to protect your plumbing.

  • Prepare Ahead: Take extra measures, like increasing insulation or dripping faucets, when severe weather is forecasted.
  • Emergency Supplies: Keep tools like wrenches, pipe insulation, and a portable heater on hand for unexpected situations.


13. Be Mindful of Snow and Ice Accumulation

Snow and ice around your home can affect your plumbing in unexpected ways.

  • Clear Ice Dams: Ice dams on your roof can lead to water seeping into walls and affecting internal plumbing.
  • Keep Vents Clear: Ensure that vents for plumbing systems, like sewer lines, remain free of snow and ice to prevent blockages.
  • Divert Snowmelt: Use downspout extensions to divert melting snow away from your foundation to protect underground plumbing.


14. Avoid Chemical Drain Cleaners

Clogged drains are more likely during winter due to grease and debris buildup. However, avoid using chemical drain cleaners as they can damage pipes, especially older ones.

  • Use Natural Solutions: Opt for boiling water, baking soda, and vinegar to clear minor clogs.
  • Drain Screens: Install screens to catch debris and prevent clogs in the first place.
  • Professional Help: For persistent clogs, call a plumber instead of relying on harsh chemicals.


15. Plan for Emergencies

Even with the best precautions, plumbing emergencies can happen. Being prepared can minimize damage and stress.

  • Keep Emergency Numbers Handy: Have the contact information of a reliable plumber available for quick assistance.
  • Stock Up on Supplies: Keep supplies like towels, buckets, and pipe repair kits ready in case of leaks.
  • Know What to Do: Familiarize yourself with shutting off the main water supply and handling minor issues like thawing frozen pipes.


Conclusion

Winterizing your plumbing is an essential task for any homeowner living in cold climates. By taking proactive measures, you can avoid the stress and expense of dealing with frozen or burst pipes. From insulating pipes and maintaining a consistent indoor temperature to investing in smart technology and scheduling regular inspections, these tips will help you protect your plumbing system throughout the winter months.

Staying vigilant and prepared ensures not only the safety of your plumbing but also the comfort and security of your home during the colder seasons. Follow these guidelines, and you’ll enjoy a worry-free winter with your plumbing system in top shape.

How Fixing a Leaking Pipe in Your Home Like a Pro Plumber

Fixing a Leaking Pipe in Your Home Like a Pro Plumber

A leaking pipe can be a homeowner’s nightmare, whether it’s a small drip or a significant burst. Water damage can lead to costly repairs, mold growth, and even structural damage if not addressed promptly. But before you rush to call a plumber, know that many leaks can be fixed with a bit of knowledge and a few tools. This comprehensive guide will walk you through the process of diagnosing, preventing, and fixing a leaking pipes like a professional plumber.

Understanding the Cause of the Leak

Before fixing a leaking pipe, it’s essential to understand why the pipe is leaking in the first place. Leaks can occur for a number of causes, and depending on the cause, different solutions may be needed. The following are the most frequent causes of pipe leaks:

  • Corrosion: Metal pipes, particularly those composed of copper or galvanized steel, are susceptible to corrosion over time. Small pinholes may result from this, which may ultimately result in leaks.
  • Excessive Water Pressure: High water pressure can put a lot of stress on your plumbing system, leading to leaks or even bursting.
  • Loose Connections: Pipe joints can loosen over time, particularly around faucets, valves, or other fittings.
  • Clogs: Clogged pipes can increase water pressure in sections of the plumbing, leading to leaks.
  • Wear and Tear: Old pipes can deteriorate, leading to cracks or broken seals.

Tools and Materials You Will Need

Fixing a leaking pipe often requires a set of specific tools. Having the right materials can make the process smoother and ensure a proper repair. Here’s what you’ll need for most common pipe leaks:

  • Adjustable Wrench: A must-have tool for tightening or loosening pipe fittings.
  • Pipe Cutter or Hacksaw: To cut out damaged sections of pipe.
  • Plumber’s Tape (Teflon Tape): Essential for creating watertight seals on pipe joints.
  • Pipe Sealant or Epoxy: Used to seal small leaks and cracks.
  • Pipe Repair Clamp: For temporarily fixing leaks until a permanent solution can be applied.
  • Replacement Pipe Sections: If the damaged pipe needs to be replaced.
  • Bucket: To catch any water that drips out while you’re working.
  • Towels or Rags: To clean up any spills and dry off the area around the leak.
  • Flashlight: For better visibility in dark or hard-to-reach places.
  • Shutoff Valve Key: To turn off the water supply if necessary.

Step-by-Step Guide to Fixing a Leaking Pipe

Step 1: Turn Off the Water Supply

Before starting any repair, always turn off the water supply to prevent further leaks and water damage. Locate the main shutoff valve in your home, which is usually found in the basement, crawl space, or near the water meter. Once the water is turned off, open faucets in your home to drain any remaining water from the pipes.

Step 2: Identify the Source of the Leak

Once the water supply is off, it’s time to locate the exact source of the leak. Sometimes, the location of the water dripping may not be the same place where the pipe is leaking. Carefully inspect the pipe for visible cracks, pinholes, or corroded areas. Leaks often occur around joints or fittings, so pay close attention to those spots.

Step 3: Dry and Clean the Area Around the Leak

Before making any repairs, dry the area around the leak thoroughly. This will help ensure that the repair materials adhere properly to the pipe. Use towels or rags to wipe down the pipe and the surrounding area. If the leak is in a hard-to-reach area, use a flashlight to get a clear view.

Step 4: Choose Your Repair Method

The best way to fix the leak will depend on the type and severity of the damage. Here are several methods you can use to address different types of pipe leaks:

Method 1: Using Plumber’s Tape (For Small Leaks Around Fittings)

Plumber’s tape, also known as Teflon tape, is an excellent option for sealing small leaks around pipe joints or fittings. Here’s how to use it:

  1. Remove the Fitting: Unscrew the fitting where the leak is located using an adjustable wrench.
  2. Apply Plumber’s Tape: Plumber’s tape should be applied by wrapping it clockwise around the pipe’s threads. To ensure a tight seal, make sure the tape overlaps.
  3. Reattach the Fitting: Make sure the fitting is snug when you screw it back onto the pipe. Restart the water supply and look for any leaks that could still be there.

Method 2: Applying Epoxy Putty (For Small Holes or Cracks)

Epoxy putty is a versatile and durable material that can be used to fix small holes and cracks in pipes. This method works well for leaks in metal and PVC pipes:

  1. Prepare the Pipe: Dry and clean the leaking section of the pipe.
  2. Mix the Epoxy: To mix the epoxy putty, adhere to the manufacturer’s instructions. For the majority of epoxies, you must knead two ingredients until the putty has a consistent hue.
  3. Apply the Putty: Press the putty onto the crack or hole, making sure it covers the entire area. Smooth it out with your fingers to ensure a tight seal.
  4. Allow Time to Cure: As directed by the manufacturer, wait for the epoxy to cure. A few minutes to many hours may pass during this process.
  5. Test the Repair: Once the epoxy has cured, turn the water supply back on and check for any leaks.

Method 3: Using a Pipe Repair Clamp (For Larger Leaks)

A pipe repair clamp is a temporary solution for larger leaks that may require a more extensive repair down the road. Here’s how to use a pipe repair clamp:

  1. Place the Clamp Over the Leak: Open the clamp and position it over the damaged section of the pipe.
  2. Tighten the Clamp: Use a wrench to tighten the clamp screws until the rubber gasket inside the clamp is pressed firmly against the pipe, creating a seal.
  3. Turn the Water Back On: Check for leaks once the water is turned back on. The clamp should hold for a while, but you’ll want to consider replacing the damaged section of the pipe as a long-term solution.

Method 4: Replacing the Damaged Section of Pipe

In some cases, especially with significant corrosion or damage, the best option is to replace the section of the pipe that’s leaking. This method requires cutting out the damaged pipe and replacing it with a new section. Here’s how to do it:

  1. Cut Out the Damaged Section: Use a pipe cutter or hacksaw to remove the damaged section of pipe. Make sure to cut at least an inch on either side of the damage.
  2. Deburr the Pipe: After cutting, use a deburring tool or sandpaper to smooth out any rough edges on the cut pipe ends.
  3. Install a New Pipe Section: Fit the new section of pipe into place using couplings. Apply plumber’s tape to the threads of the fittings, if applicable, to ensure a watertight seal.
  4. Tighten the Fittings: Use an adjustable wrench to tighten the fittings. Make sure they’re snug but avoid over-tightening, which can damage the threads.
  5. Test for Leaks: Turn the water back on and check for any leaks. If everything is sealed properly, the leak should be fixed.

Preventing Future Leaks

Once you’ve successfully fixed the leak, it’s important to take steps to prevent future problems. Here are a few tips to keep your plumbing in good shape:

1. Regularly Inspect Your Pipes

Keep an eye on your plumbing system by inspecting visible pipes regularly. Look for signs of corrosion, loose fittings, or small leaks. Catching problems early can prevent more serious damage later on.

2. Monitor Water Pressure

High water pressure can stress your pipes, leading to leaks or bursts. Invest in a pressure gauge to check your water pressure. Ideally, your home’s water pressure should be between 40 and 60 psi. If it’s too high, consider installing a pressure-reducing valve.

3. Install Water Softeners

Hard water, which contains high levels of minerals like calcium and magnesium, can lead to scale buildup in pipes and cause corrosion. A water softener can help reduce these mineral deposits and extend the life of your pipes.

4. Replace Old Pipes

If you live in an older home with galvanized steel or lead pipes, consider replacing them with more durable and modern materials, like copper or PEX. Newer pipes are less prone to corrosion and other common issues.

5. Insulate Your Pipes

In colder climates, frozen pipes are a leading cause of leaks and bursts. Insulate your pipes, especially those in unheated areas like basements or crawl spaces, to prevent them from freezing during the winter months.

When to Call a Professional Plumber

While many pipe leaks can be fixed with basic tools and a bit of DIY know-how, there are times when it’s best to call a professional plumber. Here are a few scenarios where professional help is necessary:

  • Severe or Extensive Damage: If the leak is causing significant water damage or the pipe is badly corroded, a professional plumber may be needed to ensure a proper repair.
  • Repeated Leaks: If you find yourself fixing the same pipe over and over, it may be a sign of a more significant problem with your plumbing system that requires professional attention.
  • Hidden Leaks: If you suspect a leak but can’t locate it, a plumber can use specialized equipment to detect hidden leaks inside walls, floors, or ceilings.

Conclusion

Fixing a leaking pipe in your home doesn’t have to be a daunting task. With the right tools and techniques, many leaks can be repaired in just a few hours. Understanding the cause of the leak, using appropriate repair methods, and taking preventive measures can save you from expensive water damage and frequent plumbing issues. However, don’t hesitate to call a professional if the problem is beyond your expertise or if you’re dealing with extensive damage. By being proactive and informed, you can handle most pipe leaks like a pro plumber.

Troubleshooting Radiant Floor Heating Systems: A Comprehensive Guide

Troubleshooting Radiant Floor Heating Systems

Radiant floor heating systems are known for their efficiency, comfort, and ability to deliver consistent warmth. These systems distribute heat evenly across floors and can be a game-changer in cold weather. However, like all home systems, they can occasionally encounter problems. Troubleshooting radiant floor heating issues can often be straightforward, but understanding the cause and solution requires a bit of know-how. In this guide, we’ll explore common issues with both electric and hydronic radiant floor heating systems and how to address them.

Understanding Radiant Floor Heating Systems

By warming the floor itself, radiant floor heating systems enable heat to rise and warm the surrounding area. Because it distributes heat evenly and reduces heat loss, this technique is quite effective. Radiant floor heating systems come in two primary varieties:

  1. Electric Radiant Heating Systems – These use electric cables or mats installed beneath the floor. They are ideal for small areas and can be controlled easily by a thermostat.
  2. Hydronic Radiant Heating Systems – These systems pump hot water through tubes embedded in the floor, using a boiler or water heater. Hydronic systems are more common in larger spaces or homes, as they are cost-effective for larger installations.

Each type of system can experience unique issues, so it’s important to understand the nuances of each.

Common Issues in Electric Radiant Floor Heating

1. Floor Not Heating Properly

The floor not heating up as it should is one of the most frequent problems. There are multiple reasons why this issue may arise:

  • Faulty Thermostat: The thermostat could be malfunctioning or improperly set. Checking thermostat settings is a quick way to determine if it’s sending the right signal to the heating system. Make sure it’s set to a high enough temperature and not on a timer that turns it off prematurely.
  • Loose Wiring or Connections: Over time, wiring connections can loosen, especially if the flooring is moved or repaired. Check the connections at the thermostat and where the system is wired into the main power source.
  • Burnt Out Heating Element: In electric radiant floor heating systems, the heating cables or mats are the main sources of heat. A damaged heating element will prevent the system from heating. Using a multimeter, check the resistance of the wires to determine if the element is working correctly.
  • Insufficient Insulation: Without proper insulation beneath the heating elements, heat can dissipate downward rather than upward into the room. This causes a lack of heat at the floor level and can increase energy consumption.

Solution

Begin by checking the thermostat settings and ensuring it’s working correctly. If the thermostat appears fine, inspect all electrical connections. You may need to call an electrician if there’s an issue with the wiring. If the issue persists, use a multimeter to test the heating cables. If any element is found to be faulty, you might need to replace that specific section.

2. Uneven Heating or Cold Spots

If certain parts of the floor are warm while others remain cold, you may have uneven heating or cold spots. Causes for this issue include:

  • Uneven Installation: This problem can occur if the heating cables or mats were not installed evenly. Improper spacing can lead to hot and cold spots.
  • Broken Heating Cable: Damage to one section of the heating element can result in cold spots, as electricity will not flow past the damaged area.

Solution

Start by checking the floor for any apparent installation errors, though this might be difficult if the system is under finished flooring. Using a thermal imaging camera can help identify the source of uneven heating without pulling up the floor. If the issue is a broken cable, you may need professional repair or replacement of the affected area.

Troubleshooting Hydronic Radiant Floor Heating

Hydronic radiant floor heating systems are generally more complex than electric systems. Because they involve hot water flowing through a network of tubes, they require careful attention to plumbing and temperature control.

1. Inconsistent Heating Across the Floor

Uneven heating can be a result of several issues in a hydronic system:

  • Air Trapped in the System: Air pockets within the system prevent hot water from circulating correctly, leading to uneven heating.
  • Improper Water Temperature: Hydronic systems rely on hot water to deliver heat. If the water heater or boiler isn’t maintaining the right temperature, parts of the floor will not reach the desired warmth.
  • Flow Rate Issues: Each heating zone in a hydronic system may require a specific flow rate. If the flow rate is too high or too low, it will impact heat distribution.

Solution

Start by checking the water temperature at the boiler or water heater and ensure it’s set at the recommended level. Next, bleed the system to remove any trapped air, a process that involves opening the bleed valves on each zone. Adjust the flow rate, if necessary, to maintain a consistent temperature across zones.

2. System Not Heating at All

If your hydronic system isn’t heating at all, consider these potential causes:

  • Thermostat Issue: Similar to electric systems, a faulty thermostat can prevent the system from heating. Ensure the thermostat is working and is set to a high enough temperature.
  • Pump Malfunction: Hydronic systems rely on a pump to circulate hot water through the pipes. If the pump fails, water won’t circulate, leading to no heat.
  • Zone Valve Problems: Zone valves control the flow of hot water to specific areas. If a zone valve is stuck closed or malfunctioning, it can prevent heating in that area.

Solution

Check the thermostat first to confirm it’s set correctly. Next, inspect the pump; if it’s not running, test the power supply and consider replacing it if necessary. Inspect each zone valve to ensure it’s opening and closing as it should. Some valves have a manual override, which you can use to check if the valve is operational.

3. Water Leakage

Water leakage in hydronic systems can lead to serious issues, including structural damage. Causes for water leaks may include:

  • Damaged Tubing: If tubing is punctured or worn, water can leak, resulting in heating loss and potential water damage.
  • Poor Connections: Loose connections between pipes and fittings can also lead to leaks.
  • Boiler Issues: Boilers sometimes develop leaks, which can affect the efficiency of the heating system.

Solution

Identify the source of the leak and repair it as soon as possible. Inspect all visible tubing and fittings. In some cases, you may need to remove flooring to access the tubing. If the leak is near the boiler, check for loose connections or call a professional for repairs.

Preventative Maintenance for Radiant Floor Heating Systems

Maintaining your radiant floor heating system can prevent many issues before they start. Here are some tips for keeping your system running efficiently:

  1. Regular Thermostat Checks: Test your thermostat at the start of each heating season to ensure it’s functioning correctly. Replace batteries if necessary and check all settings.
  2. Inspecting and Cleaning Components: For electric systems, inspect connections and cables periodically. For hydronic systems, inspect the boiler and pump annually to ensure they’re working efficiently. Clean filters if your system has them.
  3. Bleed Hydronic Systems Regularly: Air can accumulate in hydronic systems over time, so bleeding the system every few months can help maintain efficient heating.
  4. Monitor Energy Usage: If you notice a significant increase in energy usage without a corresponding increase in comfort, this could indicate an issue with your system.
  5. Professional Servicing: Consider having a professional inspect your system annually, especially if you have a hydronic system. A professional inspection can catch potential issues before they lead to costly repairs.

When to Call a Professional

Some radiant floor heating issues can be resolved with DIY solutions. However, certain problems require professional assistance:

  • Electrical Wiring Issues: For electric systems, if you identify an issue with the wiring, consult a licensed electrician.
  • Boiler or Pump Repairs: Hydronic systems rely on boilers and pumps, which are complex components. If you experience problems with either, hiring a professional can prevent further damage.
  • Structural Repairs: For extensive issues, such as damaged tubing embedded in concrete, professional repair may be necessary to avoid damaging your flooring.

Troubleshooting Tips Summary


IssuePossible CauseSolution
Floor not heating properly (Electric)Thermostat malfunction, loose wiring, burnt-out heating elementCheck thermostat, inspect wiring, use multimeter on heating cables
Uneven heating or cold spots (Electric)Uneven installation, damaged cableUse thermal imaging, repair or replace damaged cable
Inconsistent heating (Hydronic)Air trapped in system, improper water temperature, flow rate issuesBleed system, check boiler temperature, adjust flow rate
System not heating at all (Hydronic)Thermostat issue, pump malfunction, zone valve problemsTest thermostat, inspect pump and zone valves
Water leakage (Hydronic)Damaged tubing, loose connections, boiler issueIdentify and repair leak, call professional if necessary

Conclusion

Radiant floor heating systems offer exceptional comfort and energy efficiency, but they require some maintenance and occasional troubleshooting to perform at their best. By understanding the common issues associated with both electric and hydronic systems, homeowners can address problems quickly and maintain a warm, comfortable environment. Following preventive maintenance practices and seeking professional help when needed ensures that your radiant floor heating system operates effectively and lasts for years to come.

Home Plumbing Services in Richmond Hill: A Comprehensive Guide

Home Plumbing Services

Homeowners in Richmond Hill, like anywhere else, rely on plumbing systems to keep their homes functioning smoothly. From delivering fresh water to managing waste, plumbing plays a vital role in everyday life. However, when something goes wrong—a leaking faucet, clogged drains, or malfunctioning water heater—it’s essential to have access to reliable home plumbing services.

This article will provide an in-depth look at home plumbing services in Richmond Hill, explore common plumbing issues, offer tips on choosing the right plumber, and highlight the importance of preventative maintenance.

The Plumbing Landscape in Richmond Hill

Richmond Hill, a growing suburban town in the Greater Toronto Area (GTA), boasts a mix of modern homes and older structures. The rapid urban development means that homeowners may encounter a range of plumbing challenges. Older homes might face issues due to aging plumbing systems, while newer builds could still experience problems related to installation or material choices. The climate in Richmond Hill, with its cold winters and hot summers, also puts unique stress on plumbing systems, making reliable plumbing services an essential part of home ownership.

Common Plumbing Problems in Richmond Hill Homes

Understanding the types of plumbing issues that homeowners in Richmond Hill might face can help them identify and address problems quickly.

1. Leaky Faucets and Fixtures

Leaky faucets are one of the most common household plumbing problems, and while they may seem minor, they can waste significant amounts of water over time. Dripping taps are often caused by worn-out washers, gaskets, or seals inside the faucet. These seemingly small issues can lead to higher water bills and should be addressed promptly to avoid wasting water and incurring additional costs.

2. Clogged Drains

Kitchen sinks, shower drains, and bathroom sinks can all suffer from clogs caused by soap scum, hair, grease, or food particles. Drain blockages can range from minor slowdowns to complete obstructions, which may require professional intervention. Homeowners in Richmond Hill often try to use chemical drain cleaners, but these products can damage pipes and are not always effective.

3. Running Toilets

A toilet that continuously runs after flushing is another frequent plumbing issue. This problem is often due to a faulty flapper or fill valve, which leads to water waste. In some cases, worn-out components inside the toilet tank cause it to refill unnecessarily. Running toilets can significantly increase water usage, impacting utility bills, so timely repairs are necessary.

4. Water Heater Issues

Given the cold winters in Richmond Hill, a functioning water heater is essential for both comfort and safety. Water heater problems can manifest as a lack of hot water, fluctuating water temperatures, or strange noises coming from the unit. These issues might be due to sediment buildup, faulty thermostats, or aging units. A water heater inspection and servicing by a professional plumber can prevent the sudden loss of hot water during the cold months.

5. Pipe Leaks and Bursts

Aging or poorly installed pipes are prone to leaks and even bursts, particularly during the winter when water inside the pipes can freeze and expand. When pipes burst, they can cause significant damage to walls, floors, and personal belongings. Richmond Hill’s fluctuating weather patterns make this a common problem, especially in homes with older plumbing systems. Homeowners should be vigilant in insulating exposed pipes and having professional plumbers inspect vulnerable areas before the winter sets in.

6. Sewer Line Blockages

Sewer line blockages are a more severe plumbing issue that can lead to unpleasant odors, backed-up drains, and even flooding in the home. These blockages are typically caused by tree roots infiltrating sewer lines or by debris buildup. In Richmond Hill, where many homes are surrounded by mature trees, root intrusion is a common issue that requires professional solutions, such as hydro-jetting or trenchless sewer repair.

Specialized Plumbing Services in Richmond Hill

Plumbing services in Richmond Hill are not limited to just fixing minor issues. There is a wide range of specialized services that homeowners can access to keep their plumbing systems in top shape. Some of these services include:

1. Emergency Plumbing Services

Plumbing emergencies, such as burst pipes or major leaks, can occur at any time and often require immediate attention. Many plumbing companies in Richmond Hill offer 24/7 emergency services to address these urgent situations and prevent further damage to the home. Emergency plumbers are equipped to handle a variety of crises, ensuring that homeowners have peace of mind during stressful situations.

2. Drain Cleaning and Repair

Over time, drains can become clogged with debris, soap scum, and other substances that impede water flow. Professional plumbers in Richmond Hill use advanced tools, such as drain snakes and hydro-jetting equipment, to clean and repair drains. These services go beyond simple DIY solutions, ensuring that the entire drainage system is free from blockages and functioning optimally.

3. Water Heater Installation and Maintenance

Whether it’s a traditional tank water heater or a modern tankless system, professional plumbers in Richmond Hill offer water heater installation and maintenance services. Tankless water heaters, in particular, are becoming more popular due to their energy efficiency and space-saving design. Regular maintenance of water heaters, including flushing out sediment buildup, can extend the lifespan of the unit and ensure a consistent supply of hot water.

4. Pipe Replacement and Re-Piping Services

Old and damaged pipes can cause leaks, water pressure issues, and poor water quality. Plumbers in Richmond Hill can assess the condition of the pipes in a home and recommend replacement or re-piping services if necessary. This is especially important for older homes with aging plumbing systems that may be prone to corrosion or wear and tear.

5. Sewer Line Inspection and Repair

Sewer line problems can be catastrophic for homeowners, leading to backups and potential health hazards. Plumbers in Richmond Hill use advanced video camera technology to inspect sewer lines and identify the cause of blockages or damage. Trenchless sewer repair, which minimizes disruption to the property, is a popular option for homeowners dealing with major sewer line issues.

Choosing the Right Plumber in Richmond Hill

Selecting a reliable plumber can make all the difference when it comes to resolving plumbing issues efficiently and effectively. Here are some tips for homeowners in Richmond Hill to consider when choosing a plumber:

1. Check for Licensing and Certification

It’s essential to hire a licensed plumber to ensure that the work is done in compliance with local building codes and regulations. In Ontario, plumbers must complete an apprenticeship and obtain a license from the Ontario College of Trades. Homeowners should ask for proof of licensing before hiring a plumber to avoid unqualified contractors.

2. Look for Experience and Specialization

Not all plumbers are equally experienced in every type of plumbing issue. Some may specialize in residential plumbing, while others focus on commercial properties or specific services, such as drain cleaning or water heater installation. It’s important to choose a plumber who has experience with the specific issue you’re facing, whether it’s a sewer line problem, leaky pipes, or an emergency repair.

3. Read Reviews and Get Recommendations

Word-of-mouth recommendations from friends, family, or neighbors in Richmond Hill can be invaluable when searching for a reputable plumber. Online reviews on platforms such as Google, Yelp, or Homestars can also provide insight into the quality of service provided by local plumbing companies. Look for plumbers who have consistently positive reviews and a track record of customer satisfaction.

4. Get Multiple Quotes

Before committing to a plumber, it’s a good idea to get quotes from at least three different companies. This will give homeowners a better sense of the pricing and services offered. However, it’s important to remember that the cheapest option may not always be the best choice—quality and reliability are just as important as cost.

5. Ask About Warranties and Guarantees

A reputable plumbing company should stand behind their work with warranties or guarantees. Homeowners should ask about these policies before hiring a plumber, ensuring that they are protected in case the repair or installation doesn’t hold up over time. Some plumbers offer warranties on parts and labor, giving homeowners peace of mind knowing they won’t be left with additional expenses if something goes wrong.

The Importance of Preventative Plumbing Maintenance

While plumbing repairs are sometimes inevitable, regular maintenance can go a long way in preventing costly problems. Here are some preventative steps homeowners in Richmond Hill can take:

1. Regular Inspections

Scheduling annual plumbing inspections with a licensed professional can help identify potential problems before they become major issues. Plumbers can check for leaks, inspect water heaters, and assess the condition of pipes and drains to ensure everything is functioning correctly.

2. Water Pressure Checks

High water pressure can strain pipes and lead to leaks or bursts over time. Homeowners should regularly check their water pressure and adjust it if necessary. A plumber can install a pressure regulator to help manage water pressure levels.

3. Drain Cleaning

Routine drain cleaning can prevent clogs from forming and ensure that water flows freely through the plumbing system. While chemical drain cleaners may offer a temporary fix, professional drain cleaning services are more effective and safer for pipes.

4. Insulate Pipes

Given the cold winters in Richmond Hill, homeowners should insulate exposed pipes to prevent freezing and bursting. Pipe insulation is a relatively simple and cost-effective solution that can save homeowners from expensive repairs in the winter months.

Conclusion

Home plumbing services in Richmond Hill are essential for maintaining the comfort and functionality of any home. Whether you’re dealing with a minor leak, a clogged drain, or a major plumbing emergency, having access to experienced, licensed plumbers can make all the difference. By understanding common plumbing issues, choosing the right plumber, and investing in preventative maintenance, homeowners can ensure that their plumbing systems run smoothly and avoid costly repairs down the road.

Understanding the Apartment Mechanical Room: A Crucial Hub for Building Operations

Mechanical Room

The mechanical room in an apartment building is often overlooked by tenants, but it plays an integral role in ensuring the building’s operational efficiency and comfort. While residents may not interact with or even be aware of this space, the mechanical room houses equipment critical to the functionality of various systems in the building, such as heating, ventilation, air conditioning (HVAC), water supply, electrical distribution, and sometimes even fire suppression systems. This article aims to delve deep into the components, functions, and importance of an apartment mechanical room, as well as the safety measures associated with it.

What is a Mechanical Room?

A mechanical room, sometimes referred to as a boiler room, plant room, or utility room, is a dedicated space in a building that houses equipment used to manage the building’s mechanical systems. In the context of an apartment building, this space serves the entire building or, in some cases, multiple mechanical rooms might serve different sections or floors. These rooms contain essential equipment that ensures the comfort, safety, and utility of the building’s occupants.

Typical Systems Found in a Mechanical Room
  1. Heating, Ventilation, and Air Conditioning (HVAC) Systems
    HVAC systems control the temperature, air quality, and humidity levels within the building. In an apartment complex, centralized HVAC units or boilers may heat or cool water or air that is distributed throughout the building.
  2. Boilers
    Boilers provide hot water and heat to the building, and they are critical for maintaining comfort in residential apartments, especially in colder climates. They heat water through combustion or electric elements, which is then circulated through radiators, floor heating systems, or water heaters.
  3. Pumps and Circulators
    Pumps are responsible for moving water, coolant, or steam through the building’s HVAC or plumbing system. Circulators, specifically, ensure that hot water is evenly distributed throughout the building.
  4. Plumbing Equipment
    Mechanical rooms often house plumbing components such as pressure tanks, water heaters, and backflow preventers, all of which help regulate water distribution and ensure the system operates within safe pressure limits.
  5. Electrical Equipment
    Some mechanical rooms house electrical panels, transformers, and emergency generators. These systems are crucial for ensuring a steady power supply to the building and providing backup power in case of outages.
  6. Fire Suppression Systems
    Fire suppression equipment, such as sprinkler systems, often relies on pressurized water systems or chemical extinguishers stored in the mechanical room. These systems are designed to activate in case of a fire, ensuring that residents and the building remain protected.
  7. Ventilation Systems
    Ventilation equipment is essential for maintaining indoor air quality, controlling moisture, and removing odors, smoke, and other airborne particles. A well-functioning ventilation system ensures fresh air circulation throughout the building.

The Importance of the Mechanical Room in Apartment Buildings

Mechanical rooms are critical because they ensure that all the necessary building systems work efficiently. Here are a few key reasons why mechanical rooms are so important:

  1. Centralized Control and Accessibility
    Having a centralized space for equipment allows building managers, maintenance staff, and technicians to easily access, monitor, and service essential systems. Mechanical rooms provide a controlled environment where routine maintenance, repairs, and inspections can be conducted without disrupting the building’s occupants.
  2. Energy Efficiency and Cost Savings
    Modern mechanical rooms often include energy-efficient equipment designed to reduce power consumption and lower operational costs. For example, high-efficiency boilers, pumps with variable speed drives, and energy recovery ventilation (ERV) systems help conserve energy while maintaining optimal building performance.
  3. Climate Control and Comfort
    The HVAC system housed in the mechanical room plays a major role in regulating indoor temperatures. Proper heating, cooling, and ventilation directly impact the quality of life of the building’s residents. In apartment complexes, maintaining a stable indoor environment is essential for tenant satisfaction, and a well-maintained mechanical room helps achieve that goal.
  4. Safety and Compliance
    A properly maintained mechanical room ensures that essential safety systems—such as fire suppression and emergency generators—are ready to operate at a moment’s notice. Furthermore, local building codes often have strict regulations about the design, layout, and operation of mechanical rooms. Regular inspections ensure compliance with safety standards, helping to avoid fines and penalties while keeping residents safe.
  5. Water and Utility Management
    Efficient management of water resources is critical in any building. Mechanical rooms house the equipment that ensures water is supplied to each apartment at the right temperature and pressure. Water heaters, pressure regulators, and pumps all play a role in providing reliable hot and cold water to the building’s residents.

Layout and Design Considerations for Mechanical Rooms

The design and layout of a mechanical room are determined by the building’s size, occupancy, and specific mechanical needs. However, there are several common principles that guide the design of a functional mechanical room.

Space and Accessibility

Mechanical rooms must have enough space for the equipment to be installed, operated, and serviced without unnecessary obstruction. Building codes often dictate minimum clearance requirements around boilers, pumps, and electrical panels to ensure safety and accessibility. Maintenance staff need to be able to access all parts of the system for repairs or regular inspections.

Ventilation and Cooling

The mechanical room itself often requires its own ventilation and cooling system to prevent overheating. Boilers, electrical equipment, and pumps can generate significant heat, and without proper cooling, the room could become too hot, potentially leading to equipment failure or fire hazards.

Soundproofing

Since mechanical rooms often house noisy equipment, soundproofing is an essential consideration. Reducing noise transmission helps maintain a comfortable living environment for tenants, particularly in apartment buildings where mechanical rooms are often located in basements or near common areas.

Safety Features

A well-designed mechanical room incorporates several safety features, including:

  • Fire-Resistant Materials: Walls, doors, and ceilings should be made of fire-resistant materials to contain any potential fire within the mechanical room.
  • Proper Drainage: To prevent water damage from leaking equipment or burst pipes, mechanical rooms are typically equipped with drains that can handle any overflow or spillage.
  • Signage and Labels: Clear signage and labels on equipment are essential for ensuring that maintenance staff and emergency responders can quickly identify critical components and potential hazards.

Noise Reduction

The noise generated by the equipment in a mechanical room can be a significant concern, particularly in apartment buildings where residents live close by. To mitigate this, architects and engineers often implement soundproofing measures. These can include installing vibration dampeners on equipment like boilers and pumps, and sound-insulating materials on the walls and floors of the room.

Regular Maintenance and Inspections

The proper functioning of a mechanical room’s equipment relies heavily on routine maintenance. Neglecting regular checks can lead to system breakdowns, higher operational costs, and safety hazards. Here’s an overview of the most common maintenance tasks for apartment mechanical rooms:

  1. Boiler and HVAC Maintenance
    Annual inspections are usually required for boilers, including checking for leaks, corrosion, and proper combustion. HVAC systems should be inspected seasonally to ensure that filters are replaced, ducts are clean, and components such as compressors and fans are working properly.
  2. Water Heater Maintenance
    Water heaters, whether gas or electric, need regular inspections to check for sediment buildup, leaks, or any signs of wear and tear. A well-maintained water heater can significantly reduce energy consumption and extend the lifespan of the equipment.
  3. Pumps and Circulators
    Pumps need to be checked for leaks, lubrication, and operational efficiency. Circulators require similar attention, particularly when they are responsible for distributing hot water or steam across the building.
  4. Fire Suppression System Checks
    Fire suppression systems require frequent testing to ensure they are functioning correctly. This involves testing alarms, checking sprinkler heads for obstructions, and ensuring that the system has enough pressure to activate in case of a fire.
  5. Electrical System Inspections
    Electrical panels and generators need periodic inspections to ensure that wiring, breakers, and grounding are functioning as intended. Emergency generators should be tested regularly to ensure they will operate when needed.
  6. Ventilation System Cleaning
    Ventilation systems can become clogged with dust, dirt, and debris over time, reducing air quality and increasing the workload on fans and other components. Regular cleaning and filter replacement are essential for maintaining indoor air quality and system efficiency.

Common Issues in Mechanical Rooms

Even with regular maintenance, issues can arise in the mechanical room that require immediate attention. Here are some of the most common problems:

  1. Leaks
    Water or gas leaks can be extremely dangerous and need immediate attention. Leaks can lead to water damage, mold growth, or fire hazards in the case of gas leaks. Identifying the source and addressing it quickly is key to preventing more significant issues.
  2. Pressure Problems
    Boilers, pumps, and water heaters are all susceptible to pressure issues. Low pressure can result in reduced heating or hot water availability, while high pressure can cause leaks or system failures.
  3. Component Failure
    Over time, components such as valves, filters, and fans can wear out. Regular inspections help identify failing parts before they lead to larger problems.
  4. Electrical Issues
    Faulty wiring, tripped breakers, or overloaded circuits can cause power outages or even fires. Routine inspections of electrical systems help mitigate these risks.

Safety Measures in Mechanical Rooms

Mechanical rooms house equipment that operates under high pressure, temperature, and sometimes contains hazardous materials. As a result, they pose a safety risk if not maintained properly. Key safety measures include:

  1. Restricted Access
    Mechanical rooms should be accessible only to trained personnel to prevent accidents. Proper signage indicating potential hazards is essential to avoid unauthorized entry.
  2. Fire Safety
    Fire-resistant doors and walls, as well as fire suppression systems, are crucial. All staff should be trained in fire safety protocols, and fire extinguishers should be available and maintained.
  3. Ventilation
    Proper ventilation is critical, especially in rooms that house boilers and other fuel-burning equipment. Inadequate ventilation can lead to a buildup of harmful gases, such as carbon monoxide.
  4. Personal Protective Equipment (PPE)
    Staff working in mechanical rooms should be equipped with appropriate PPE, including gloves, safety goggles, and hearing protection, depending on the tasks they are performing.

Conclusion

Though often hidden from sight, the mechanical room in an apartment building is the heart of its operational systems. It houses critical components such as the HVAC system, boilers, electrical systems, and plumbing that ensure the comfort, safety, and well-being of its residents. Regular maintenance, proper design, and strict safety protocols are essential to keeping the mechanical room functioning efficiently and safely. While tenants may rarely think about the mechanical room, its importance cannot be overstated—it is the silent guardian of the apartment building’s functionality and comfort.

How to Install a Kitchen Faucet: A Step-by-Step Guide

Install a Kitchen Faucet

Installing a new kitchen faucet is a straightforward task that can significantly improve the look and functionality of your kitchen. Whether you’re upgrading to a modern faucet with a pull-down sprayer or simply replacing an old, worn-out model, this project can typically be completed in a few hours with some basic tools. This guide will walk you through the process of installing a kitchen faucet, from preparation to final adjustments, ensuring a successful and leak-free installation.

Tools and Materials Needed

Before you begin, gather the following tools and materials:

  • Adjustable wrench
  • Basin wrench (optional but helpful)
  • Plumber’s tape (Teflon tape)
  • Bucket or towels
  • Plumber’s putty or silicone caulk
  • New kitchen faucet (including any supplied hardware)
  • Supply lines (if not included with the faucet)
  • Flashlight (optional, for better visibility under the sink)

1. Preparing for the Installation

Turn Off the Water Supply

The first step in any plumbing project is to turn off the water supply to avoid flooding your kitchen. Locate the shut-off valves under the sink, usually attached to the hot and cold water supply lines. Turn these valves clockwise to close them. If your home doesn’t have shut-off valves for the sink, you’ll need to shut off the main water supply to the house.

Clear the Area Under the Sink

Remove any items stored under the sink to create a clear workspace. Place a bucket or towels under the sink to catch any water that may spill when you disconnect the old faucet. This will help keep the area dry and prevent water damage to your cabinets.

Disconnect the Old Faucet

Using an adjustable wrench or basin wrench, disconnect the water supply lines from the faucet. Loosen the nuts connecting the supply lines to the faucet, and carefully pull the lines away from the faucet. If your faucet has a sprayer, disconnect the hose as well.

Next, remove the mounting nuts that secure the faucet to the sink. These are usually located under the sink and can be tricky to reach, so using a basin wrench can make this easier. Once the nuts are removed, you should be able to lift the old faucet out of the sink.

Clean the Sink Area

Before installing the new faucet, clean the area around the sinkholes. Scrape away any old plumber’s putty, caulk, or debris left behind by the old faucet. This ensures a clean surface for the new faucet to sit on and helps prevent leaks.

2. Installing the New Faucet

Check the Faucet and Instructions

Unbox your new faucet and ensure all parts are included, such as mounting hardware, gaskets, and supply lines. Most faucets come with a detailed installation manual, which you should review before beginning. While this guide provides general instructions, your specific faucet model may have unique installation steps or requirements.

Apply Plumber’s Putty or Sealant

If your faucet requires it, apply a bead of plumber’s putty or silicone sealant around the base of the faucet or the gasket. This helps create a watertight seal between the faucet and the sink. Plumber’s putty is generally easier to work with and can be molded to fit around the base of the faucet. Silicone sealant is a more permanent option, providing a strong, flexible seal.

Position the Faucet

Carefully position the faucet over the sinkholes. Ensure that the faucet is aligned properly and that any additional components, such as a soap dispenser or sprayer, are placed in the correct locations. If your faucet includes a deck plate, this should be positioned first, with the faucet sitting on top of it.

Once the faucet is in place, press down firmly to seat it against the sink. If you used plumber’s putty, some excess may squeeze out from under the faucet base. This can be wiped away after the faucet is secured.

Secure the Faucet Under the Sink

With the faucet correctly positioned, go underneath the sink to secure it. Most faucets are held in place with mounting nuts or brackets that screw onto the faucet shanks. Slide these nuts or brackets over the faucet shanks, and tighten them by hand to hold the faucet in place.

Use an adjustable wrench or basin wrench to further tighten the mounting nuts. Be careful not to overtighten, as this can damage the sink or faucet. The faucet should feel secure and not move when you try to wiggle it from above.

Attach the Supply Lines

Next, attach the water supply lines to the faucet shanks. If your new faucet did not come with supply lines, you’ll need to purchase them separately. Flexible braided stainless steel lines are recommended for their durability and ease of installation.

Wrap the threads of the faucet shanks with plumber’s tape to help create a watertight seal. Then, connect the supply lines to the hot and cold water shanks, tightening the connections with an adjustable wrench. Be sure to connect the hot water line to the hot water shank (usually marked with a red label) and the cold water line to the cold water shank (marked with blue).

Install the Sprayer Hose (If Applicable)

If your faucet includes a pull-down sprayer or side sprayer, now is the time to install the hose. Feed the hose through the faucet spout and connect it to the faucet body or the diverter, depending on your faucet’s design.

Some faucets use a quick-connect system for attaching the hose, which simply clicks into place. Others may require you to tighten a coupling nut by hand or with a wrench. Make sure the hose is securely attached and test the sprayer to ensure it extends and retracts smoothly.

3. Testing and Final Adjustments

Turn On the Water Supply

Once the faucet is installed and all connections are secure, it’s time to turn the water supply back on. Slowly open the shut-off valves under the sink, first the cold water, then the hot water. This gradual process helps prevent sudden pressure surges that can cause leaks.

Check for Leaks

After turning the water supply back on, carefully inspect all the connections for leaks. Look under the sink at the supply line connections and around the base of the faucet for any signs of water. If you notice a leak, turn off the water supply and tighten the connection or reapply plumber’s tape as needed.

It’s also a good idea to run the water through the faucet and sprayer at different temperatures and pressures to ensure everything is functioning properly. Listen for any unusual noises or sputtering, which could indicate air in the lines or a loose connection.

Adjust the Faucet Handle and Sprayer

If your new faucet has an adjustable handle or sprayer, take this time to fine-tune their positions. The handle should move smoothly between hot and cold settings, and the sprayer should extend and retract without difficulty. If necessary, make minor adjustments to the connections or mounting hardware to achieve the best performance.

Clean Up

After confirming that the faucet is working correctly and there are no leaks, clean up the installation area. Wipe away any excess plumber’s putty, sealant, or debris. Reassemble any items you removed from under the sink, and tidy up your tools.

Finally, take a moment to admire your work. You’ve successfully installed a new kitchen faucet, improving both the functionality and appearance of your kitchen.

4. Troubleshooting Common Issues

Low Water Pressure

If you experience low water pressure after installing your new faucet, there could be several reasons for this. First, check that the shut-off valves are fully open. Partially closed valves can restrict water flow, leading to low pressure. If the valves are open and the pressure is still low, check the aerator at the tip of the faucet spout. The aerator can become clogged with debris or mineral deposits, which can be cleaned by unscrewing the aerator and soaking it in vinegar.

If the problem persists, there may be an issue with the faucet itself or the supply lines. Double-check all connections to ensure they are tight and free of leaks. If you cannot identify the source of the problem, consult the manufacturer’s instructions or contact customer support for assistance.

Faucet Handle is Loose or Wobbly

A loose faucet handle can be annoying and may lead to further issues if not addressed. Most faucet handles are secured with a set screw, often hidden under a small cap or decorative cover. If your handle is loose, check for this screw and tighten it with an appropriate tool, usually a hex key or screwdriver.

If tightening the set screw does not resolve the issue, there may be a problem with the mounting hardware or the handle’s internal components. In such cases, you may need to disassemble the handle to inspect for worn parts or improper installation.

Sprayer Hose Doesn’t Retract Properly

If your pull-down sprayer hose doesn’t retract smoothly or gets stuck, there are a few things you can try. First, ensure that the hose is not tangled or kinked under the sink. A tangled hose can prevent the sprayer from retracting fully. If the hose is clear, check the weight attached to the hose under the sink. This weight helps the hose retract, and it may need to be adjusted or repositioned to allow for smoother operation.

If the hose still doesn’t retract properly, the problem could be with the hose itself or the faucet’s internal mechanisms. In this case, refer to the manufacturer’s troubleshooting guide or contact customer support.

Leaking Around the Faucet Base

If you notice water pooling around the base of your faucet, there may be an issue with the seal between the faucet and the sink. Check that the mounting nuts under the sink are tight and that the gasket or plumber’s putty is properly seated. If necessary, you may need to remove the faucet and reapply plumber’s putty or sealant to ensure a watertight seal.

Leaks can also occur if the faucet body is damaged or defective. If you suspect a manufacturing defect, contact the retailer or manufacturer for a replacement.

Conclusion

Installing a kitchen faucet is a manageable DIY project that can enhance both the aesthetics and functionality of your kitchen. By following this step-by-step guide, you can confidently replace an old faucet or install a new one, ensuring it is securely mounted, leak-free, and functioning perfectly. Remember to take your time, carefully follow the manufacturer’s instructions, and troubleshoot any issues that arise. With a little patience and effort, you’ll enjoy the satisfaction of a job well done and a beautiful new faucet that serves your kitchen for years to come.

Electric vs. Hydronic In-floor Heating: A Comprehensive Comparison

Electric vs. Hydronic In-floor Heating

In-floor heating, often referred to as radiant floor heating, is a luxurious and efficient way to heat homes. It involves the installation of heating elements beneath the floor surface, ensuring warmth from the ground up. This method of heating has grown in popularity due to its energy efficiency, comfort, and the even distribution of heat. There are two main types of in-floor heating systems: electric and hydronic (water-based). Each of these systems has its own set of advantages, disadvantages, and specific applications. This article will explore the key differences, benefits, and drawbacks of electric and hydronic in-floor heating, helping homeowners and builders make an informed decision when choosing the right system for their needs.

1. Overview of Electric and Hydronic In-floor Heating Systems

Electric In-floor Heating

Electric in-floor heating systems utilize electrical resistance to generate heat. These systems typically consist of thin heating cables or mats that are installed beneath the flooring material. The cables are connected to a thermostat that regulates the temperature, allowing the user to control the level of warmth. Electric systems are known for their simplicity and ease of installation, making them a popular choice for both new builds and renovations.

Hydronic In-floor Heating

Hydronic in-floor heating systems, on the other hand, use heated water to warm the floor. These systems consist of a network of pipes, usually made from cross-linked polyethylene (PEX), which circulate hot water beneath the floor surface. The water is heated by a boiler or water heater and is pumped through the pipes, radiating heat upward into the living space. Hydronic systems are more complex and require a more extensive installation process, but they are often more energy-efficient and cost-effective in the long term, especially for larger areas.

2. Installation Process

Electric In-floor Heating Installation

The installation of electric in-floor heating is relatively straightforward. The process typically involves laying the heating cables or mats on top of the subfloor, securing them in place, and then covering them with the flooring material, such as tile, stone, or laminate. Some systems come with a self-adhesive backing, which simplifies the installation process even further. The heating elements are then connected to a thermostat, which can be programmed to control the temperature and timing of the heating.

Electric in-floor heating systems are well-suited for smaller areas, such as bathrooms, kitchens, or individual rooms, due to their ease of installation and the relatively low cost of materials. They are also a good option for retrofit projects where the flooring is being replaced or renovated, as the system can be installed without major structural changes.

Hydronic In-floor Heating Installation

The installation of hydronic in-floor heating systems is more complex and requires careful planning. The process involves laying a network of PEX pipes on top of the subfloor, which is then covered by a layer of concrete or another type of floor screed. The pipes must be arranged in a specific pattern, such as a serpentine or spiral, to ensure even heat distribution. After the pipes are installed and the floor is finished, the system is connected to a boiler or water heater, and a pump circulates the hot water through the pipes.

Hydronic systems are best suited for larger areas or whole-house heating applications. Due to the complexity of the installation, these systems are typically installed during the construction of a new home or during a major renovation. The initial installation cost is higher compared to electric systems, but hydronic systems can be more cost-effective in the long run, especially in colder climates where heating demands are high.

3. Energy Efficiency and Operating Costs

Electric In-floor Heating Efficiency and Costs

Electric in-floor heating systems are generally less energy-efficient than hydronic systems, especially in larger spaces. The efficiency of an electric system depends on the cost of electricity, the size of the heated area, and the insulation of the home. Electric systems are typically more expensive to operate in areas with high electricity rates or where the system is used as the primary source of heat.

However, electric systems have a low upfront cost and are very efficient for heating smaller spaces. They are often used as a supplemental heating source, reducing the need to rely on central heating systems, which can save energy and reduce overall heating costs. Additionally, electric systems can be zoned, allowing different areas of the home to be heated independently, which can further improve efficiency.

Hydronic In-floor Heating Efficiency and Costs

Hydronic in-floor heating systems are known for their high energy efficiency, especially when used to heat large areas or entire homes. These systems can be connected to a variety of heat sources, including high-efficiency boilers, solar thermal systems, or heat pumps, which can significantly reduce operating costs. The use of water as a heat transfer medium is also more efficient than electricity, as water retains and distributes heat more effectively.

While the initial installation cost of a hydronic system is higher, the lower operating costs can make it a more economical option over time. Hydronic systems are particularly efficient in colder climates or in homes with high heating demands, where the system can provide consistent, even heat throughout the entire space. The ability to integrate the system with renewable energy sources also makes it an attractive option for environmentally conscious homeowners.

4. Comfort and Performance

Comfort with Electric In-floor Heating

Electric in-floor heating systems provide quick and responsive heat, making them ideal for areas where rapid temperature adjustments are needed. The heat is evenly distributed across the floor surface, creating a warm and comfortable environment. Because the heat is radiant, it does not rely on air circulation, which can reduce drafts and the spread of allergens.

However, electric systems can sometimes result in hot spots if not installed correctly, and the heat may not penetrate as deeply as in a hydronic system, particularly in rooms with high ceilings or poor insulation. The system’s performance can also be affected by the type of flooring used, as certain materials, like thick carpets, can insulate the floor and reduce heat transfer.

Comfort with Hydronic In-floor Heating

Hydronic in-floor heating systems are known for providing consistent and even heat across large areas. The system’s use of water as a heat medium ensures that the floor surface stays warm for an extended period, even after the system is turned off. This creates a stable and comfortable indoor environment, without the temperature fluctuations that can occur with other heating systems.

The slow response time of hydronic systems can be a drawback in some cases, particularly in homes where quick temperature adjustments are needed. However, the overall comfort and performance of hydronic systems are generally superior to electric systems, especially in larger spaces or in homes with open floor plans.

5. Durability and Maintenance

Durability and Maintenance of Electric Systems

Electric in-floor heating systems are relatively low maintenance and have no moving parts, which reduces the likelihood of mechanical failure. The heating cables or mats are designed to last for many years, often with warranties of 20 years or more. If an issue does arise, such as a break in the heating cable, it can usually be located and repaired without extensive disruption to the floor.

The durability of an electric system also depends on the quality of the installation and the materials used. Proper insulation and careful installation are critical to ensuring the longevity and performance of the system. In general, electric systems require minimal maintenance once installed, making them a convenient option for homeowners.

Durability and Maintenance of Hydronic Systems

Hydronic in-floor heating systems are also highly durable but require more maintenance than electric systems due to the complexity of the components involved. The PEX pipes used in hydronic systems are designed to last for several decades, often with warranties of up to 50 years. The boiler or water heater, pumps, and other mechanical components may require regular maintenance to ensure optimal performance and longevity.

Potential issues with hydronic systems include leaks in the piping or problems with the boiler or pump. However, these issues are relatively rare if the system is installed correctly and maintained properly. Regular inspection and servicing of the boiler and pumps can help prevent problems and ensure the system operates efficiently for many years.

6. Environmental Impact

Environmental Considerations for Electric Systems

The environmental impact of an electric in-floor heating system largely depends on the source of the electricity used to power the system. In areas where electricity is generated from renewable sources, such as wind or solar power, the environmental footprint of an electric system can be relatively low. However, in regions where electricity is primarily generated from fossil fuels, the environmental impact can be significant.

Electric systems are often more energy-efficient for small-scale or supplemental heating, which can help reduce overall energy consumption. However, for larger areas or whole-house heating, the energy use of an electric system can be higher, leading to a larger carbon footprint compared to hydronic systems.

Environmental Considerations for Hydronic Systems

Hydronic in-floor heating systems can be more environmentally friendly, especially when paired with high-efficiency boilers, heat pumps, or renewable energy sources like solar thermal systems. The use of water as a heat transfer medium is more efficient, which reduces the overall energy consumption and environmental impact of the system.

The ability to integrate hydronic systems with renewable energy sources makes them an attractive option for homeowners looking to reduce their carbon footprint. Additionally, the lower operating costs and longer lifespan of hydronic systems can contribute to a more sustainable and environmentally friendly heating solution over time.

7. Cost Comparison

Initial Costs

The initial cost of an electric in-floor heating system is typically lower than that of a hydronic system. The materials and installation process for electric systems are simpler and less labor-intensive, making them a more affordable option for smaller projects or renovations. However, for larger areas or whole-house heating, the cost of installing multiple electric systems can add up.

Hydronic systems have a higher initial cost due to the complexity of the installation and the need for additional components such as a boiler, pumps, and manifolds. The cost of the PEX piping and floor screed also contributes to the higher upfront cost. However, for large-scale installations, the cost per square foot can be more competitive compared to electric systems.

Operating Costs

The operating costs of an electric in-floor heating system are generally higher than those of a hydronic system, particularly in areas with high electricity rates. Electric systems can become expensive to run if used as the primary heating source for a large area or a whole house. However, they can be cost-effective for small spaces or as a supplemental heating solution.

Hydronic systems have lower operating costs, especially when used for whole-house heating or in larger spaces. The use of energy-efficient boilers, heat pumps, or renewable energy sources can further reduce the operating costs, making hydronic systems a more economical choice in the long term.

8. Applications and Suitability

Ideal Applications for Electric In-floor Heating

Electric in-floor heating systems are best suited for smaller areas, such as bathrooms, kitchens, or individual rooms. They are also ideal for retrofit projects where the flooring is being replaced, as the system can be installed without major structural changes. Electric systems are a good choice for homeowners looking for a quick and easy way to add supplemental heat to specific areas of their home.

Ideal Applications for Hydronic In-floor Heating

Hydronic in-floor heating systems are more suitable for large areas or whole-house heating applications. They are particularly well-suited for new builds or major renovations, where the complexity of the installation can be accommodated. Hydronic systems are also a good choice for homes in colder climates or with high heating demands, where the efficiency and performance of the system can be fully utilized.

9. Conclusion

When deciding between electric and hydronic in-floor heating, it is important to consider the specific needs and circumstances of the home or building project. Electric systems offer simplicity, ease of installation, and are ideal for smaller spaces or retrofit projects. They provide quick, responsive heat and are a cost-effective solution for supplemental heating.

On the other hand, hydronic systems are more complex and have a higher initial cost, but they offer superior energy efficiency and are more suitable for large-scale or whole-house heating. They provide consistent, even heat and can be integrated with renewable energy sources, making them a more sustainable option in the long run.

Ultimately, the choice between electric and hydronic in-floor heating will depend on factors such as the size of the area to be heated, the budget, the local climate, and the long-term energy goals of the homeowner. Both systems have their own unique advantages and can provide comfortable, efficient heating when used in the right application. By carefully weighing the pros and cons of each system, homeowners can select the in-floor heating solution that best meets their needs and enhances the comfort and efficiency of their living space.